Run your own Ethereum Node
With the evolution of Web3, developers are rapidly building decentralized applications on Ethereum. Building Dapps on ethereum are cool, though they come with some infrastructure setup drawbacks.

Helping developers to build high-performance DApps quickly
What is Quicknode?
With the evolution of Web3, developers are rapidly building decentralized applications on Ethereum. Building Dapps on Ethereum is cool, though they come with some infrastructure setup drawbacks. You need to set up an ethereum node to interact with the blockchain and this setup needs time, infra and skills. QuickNode solves this problem by providing Ethereum node as Service.
As QuickNode website quotes:
“The fastest and easiest way to run your own Ethereum node.”
Why you should use QuickNode?
Running your own private Ethereum node is cumbersome. There are three problems with that:
- Infra — Blockchains are distributed Ledgers and a full node means the entire copy of the ledger, that maybe not possible on the home computer anymore as ethereum blockchain size is around 4TB now, even fast/full sync is around 300 GB.
- Time — First time syncing takes time and syncing Ethereum MainNet can take days, depending on the internet speed.
- Skills — Node clients are cranky, you'll need to tune your environment and keep a close eye on them. You'll also need to consider the security of your node. You need to have some cybersecurity skills to secure your node.
What QuickNode provides?
QuickNode solves this problem by providing you a full node on a click of a button. Instead of using shared public nodes, QuickNode provides you a dedicated node. QuickNode is optimized for performance, speed, and flexibility. Let's see how QuickNode achieves this.
Dedicated Node- With the use of dedicated nodes helps you increase performance for your blockchain queries as it’s only taking queries for your DApp.
Multiple Zones- QuickNode supports 8 different Zones. That helps in optimizing networks call time which boosts speed and performance for your DApp.
Multiple Testnet support — QuickNode support almost all famous ethereum testnets. That gives immense flexibility to a developer by testing application on their preferred testnet.
Archive Nodes — QuickNode provide Parity archive nodes too. An archive node keeps full copy of blockchain ledger in comparison to full nodes who may do pruning for obvious infra reasons. This is very important feature for businesses benefit from blockchain analysis and research. You can learn more about QuickNode archive nodes here.
Also, QuickNode support Parity and Geth both client. Isn’t it cool? 😃
Signing up with QuickNode
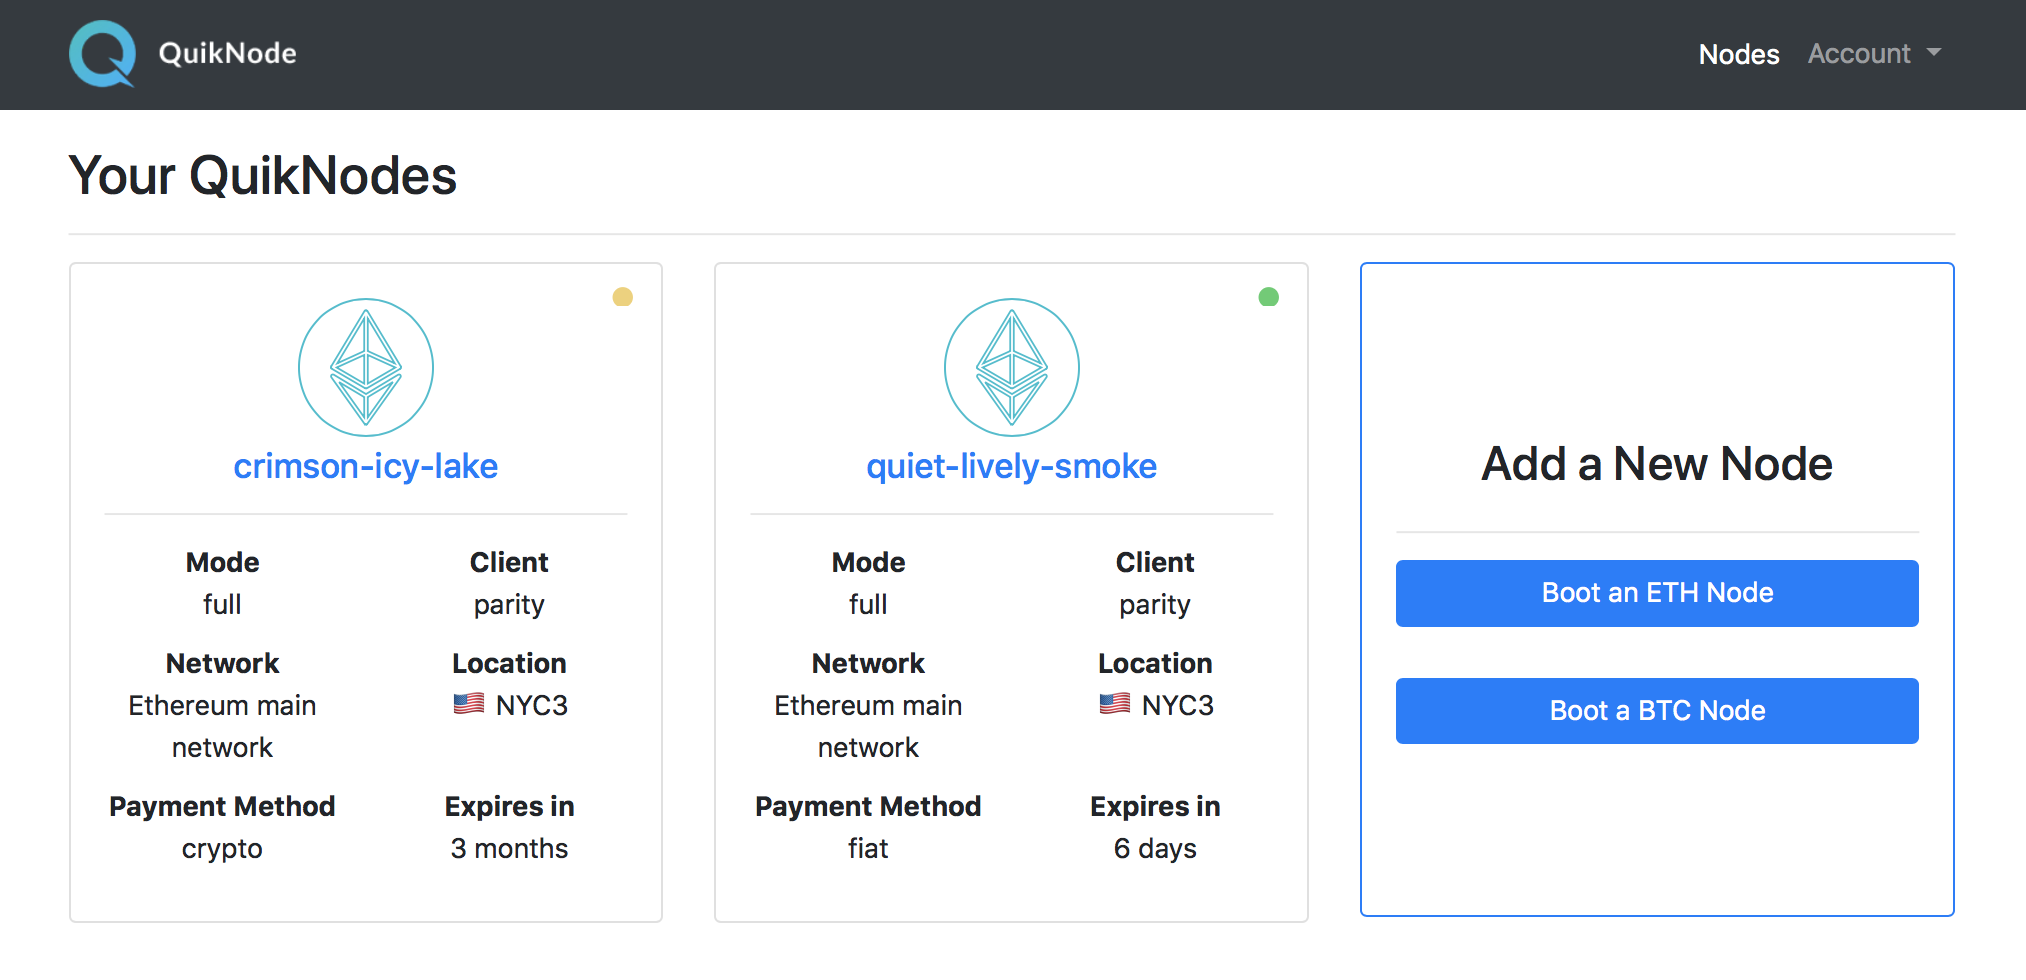
Let’s sign up for the QuickNode. Once you have completed registration, you can configure your node. You can choose Network, Zone, Client, and Synchronization mode. After launch, you will see your nodes and status for each in your dashboard:
Connecting with QuickNode
I have created a Kovan Testnet and my zone is Bangalore (India). Remember, your node has to be in READY, otherwise, it will not work. You can rebuild your node or contact QuickNode team if you face any problem.
Connection URI
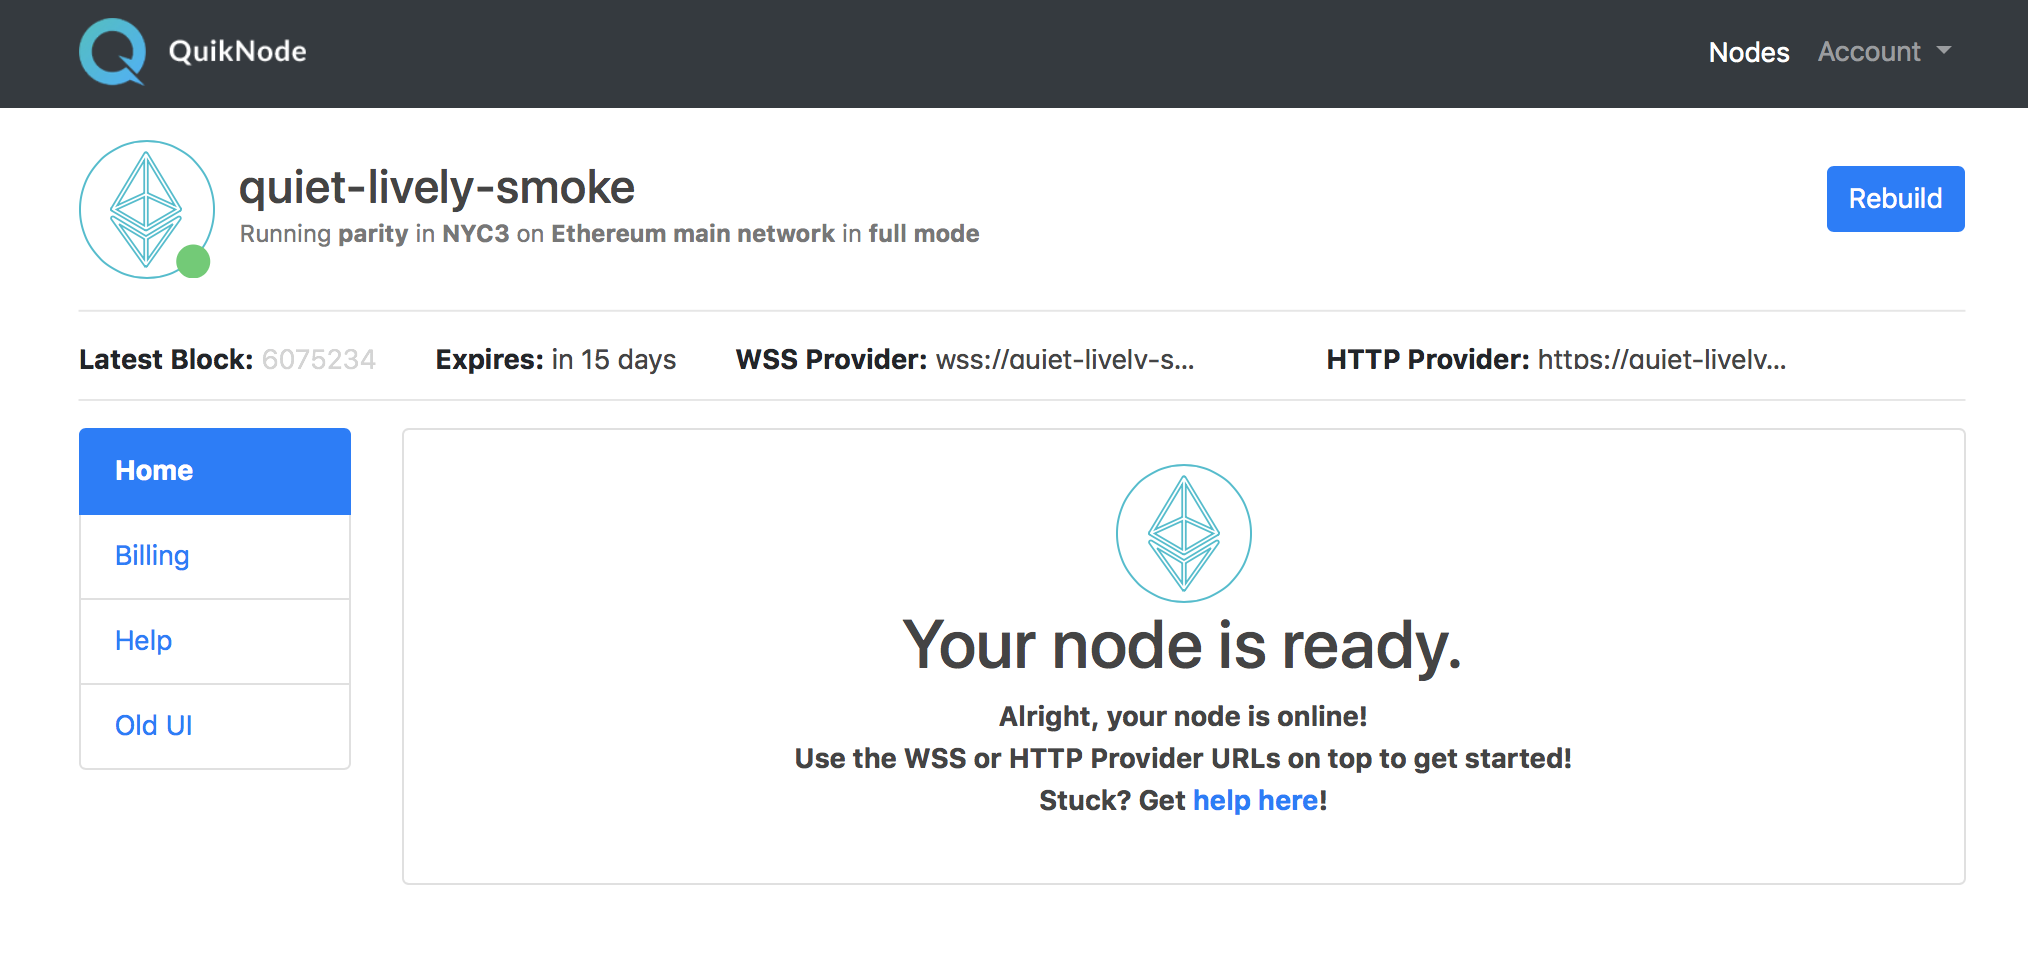
QuickNode supports both HTTPProvider and Websockets (we will see them later). You can find these links at the top of the Node dashboard:
Now Let’s deep dive in some code.
Sending Ethereum transaction using web3js and QuickNode
Let's test QuickNode and see how it works. To start, let’s broadcast a raw transaction with QuickNode using web3js.
Let’s create a node js project and install Web3js. Create a project directory and run below commands.
mkdir quicknode
cd quicknode
npm init
npm install web3
Setup Web3 using QuickNode
Let’s create an Index.js file and setup web3. As you can see we add using QuickNode HttpProvider link. We will connect to our node using this link. Now all the commands we will run will be going through this node and will use Kovan Network.
const Web3 = require('web3')
const httpProvider = "https://mistakenly-smart-jay.quiknode.io/86d9e35e-8cdb-47ad-80a4-84f9e9537afa/C0_tKUunhUc0rM_i1HMxHA==/"
var web3 = new Web3(new Web3.providers.HttpProvider(httpProvider));
To test the network add these line and check the network id, Kovan network Id is 42.
web3.eth.net.getId(function(err, data){console.log(data);})
Creating an account
Let’s create a new ethereum account on Kovan network.
web3.eth.getBalance('0x75E18d32f2DbEEfaF4055aD709BDe98eCB57C379', (err, wei) => {
balance = web3.utils.fromWei(wei, 'ether')console.log(balance);});
This will give us a private key and address, using which we will create a raw transaction.
You can check the balance using below
web3.eth.getBalance('0x75E18d32f2DbEEfaF4055aD709BDe98eCB57C379', (err, wei) => {
balance = web3.utils.fromWei(wei, 'ether')console.log(balance);});
Signing an Ethereum transaction
Let’s get some Test ethers using Kovan network faucet and sign a transaction. Ethier, you can generate a new address as a recipient or just use any address from Kovan block explorer.
web3.eth.accounts.signTransaction({
    from: address, // our address
    to: address2,  // any other kovan network address you want to send
    value: '2000000000000000',
    gas: '8000000'},privateKey, function(err, data) {    	      console.log(data);
 });
Sending transaction
Now let’s broadcast this signed transaction using QuickNode.
web3.eth.accounts.signTransaction({
    from: address,
    to: address2,
    value: '2000000000000000',
    gas: '8000000'
}, privateKey, function(err, data) {
    web3.eth.sendSignedTransaction(data.rawTransaction, function(err, receipt) {
        console.log("receipt", receipt);
        web3.eth.getTransaction(receipt, function(err, data) {
            console.log("transaction", data);
        })
    });
});
We have successfully sent a transaction using QuickNode on Kovan network, you can check this transaction on Kovan block explorer.
Using WebSockets with QuickNode
QuickNode supports WebSockets too. You can find a web socket connection link under Dev Tools. Either you can use it with HTTPs Auth or Token Auth. Token auth link will look like something below.
- Token auth: wss://mistakenly-smart-jay.quiknode.io/86d9e35e-8cdb-47ad-80a4-84f9e9537afa/C0_tKUunhUc0rM_i1HMxHA==/
WebSockets allow both the server and the client to push messages at any time without any relation to a previous request as opposed to HTTP where the client creates a connection with the server every time. In WebSocket connection get created once, server and client push messages using the connection. Websockets are best for an event-based system. Websockets are supported by almost every browser.

Subscribing pending Transaction events
Let’s subscribe pending transaction of Ethereum blockchain. You can see we are passing QuickNode WebSocket URI while initializing web3.
const Web3 = require('web3') const webSocket = "wss://mistakenly-smart-jay.quiknode.io/86d9e35e-8cdb-47ad-80a4-84f9e9537afa/C0_tKUunhUc0rM_i1HMxHA==/"
var web3 = new Web3(webSocket);
var subscription = web3.eth.subscribe('pendingTransactions', function(error, result) {
    if (!error) console.log(result);
}).on("data", function(transaction) {
    console.log(transaction);
});
QuickNode with Truffle
Let’s see how we’ll use QuickNode with Truffle and deploy smart contracts. So for that lets download Truffle Petshop. We will simply unbox it and deploy it using QuickNode.
truffle unbox pet-shopWe will use truffle-HD-wallet to deploy our pet-shop smart contracts. So you need to install it too.
npm install truffle-hdwallet-providerNow let’s see the configuration of our Truffle’s config. We will simply add HttpProvider URI to use QuickNode as mentioned below.
var HDWalletProvider = require("truffle-hdwallet-provider");
var mnemonic = "YOUR_MEMONICS"; // use a funded wallet
module.exports = {
    networks: {
        development: {
            host: "127.0.0.1",
            port: 7545,
            network_id: "*" // Match any network id
        },
        kovan: {
            provider: function() {
                return new HDWalletProvider(mnemonic, "https://mistakenly-smart-jay.quiknode.io/86d9e35e-8cdb-47ad-80a4-84f9e9537afa/C0_tKUunhUc0rM_i1HMxHA==/")
            },
            network_id: 42
        }
    }
};QuickNode Stats Features
So now let's talk about QuickNode’s Stat feature which gives you visibility what's happening with your Dapp.
- Stats / Node Peers / Node Logs — QuickNode provides different types of stats, by which you can measure your Dapps Usage. You can check the number of requests, Load on your node and WebSocket messages other things. QuickNode also provides peers contacted your node and the logs.

Conclusion
QuickNode is an awesome and useful addition to the Ethereum ecosystem. It’s fast and completely private. Many high performances DApps will end up running their own node for better performance. Now they don’t need to set up the node. QuickNode’s team is awesome and you can reach them via Slack.
Note: Mentioned QuickNode links will not work, my QuickNode subscription is expired.
Need help with your project or have questions? Contact us via this form, on Twitter @QuickNode, or ping us on Discord!
About QuickNode
QuickNode is building infrastructure to support the future of Web3. Since 2017, we’ve worked with hundreds of developers and companies, helping scale dApps and providing high-performance access to 16+ blockchains. Subscribe to our newsletter for more content like this and stay in the loop with what’s happening in Web3! 😃


